Footer Year

Add the Footer Year to Any site

Found this little trick recently to auto update the year in your footer:

Add this to functions:


/* Renders current year */ 
function display_current_year() {
    return date('Y');
}
add_shortcode('current_year', 'display_current_year');


Put this shortcode where you want the year to show up:

[current_year]


Updating Page Details (the7)

Updating Page Details (the7)

Updating Page Details (the7)

Example Project: Bird Nest – tbirdparts.com

Main E-Commerce Shop

There are many different ways to display products for sale on a website. The most common is the use of an E-commerce platform. This allows users to search for products by color, weight, size, etc. The store has built-in shipping calculators and makes ordering online a breeze. The Bird Nest website uses a third-party E-commerce store from parts123.com This shop is linked to the main menu under the “Parts” tab. When someone goes there they can browse everything the company has to sell. If they click the home button in the main menu they are sent back to the main Bird Nest website. To update inventory the Bird Nest has its own login to parts123.com

E-Commerce Page – Tbirds For Sale – (What rest of article is about)

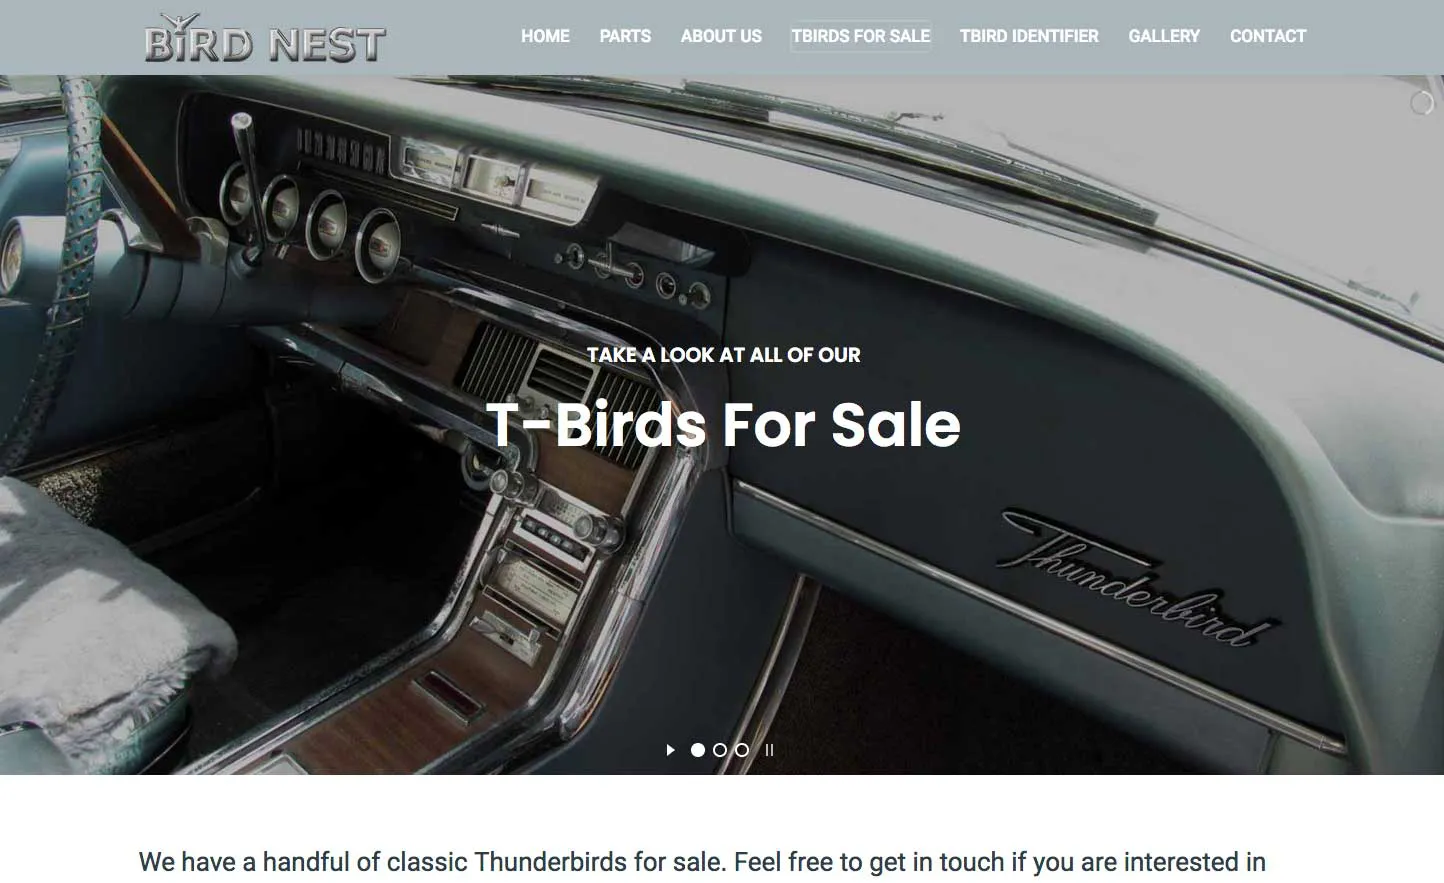
The Bird Nest site also has a page titled “Tbirds For Sale.” This is found in the main menu of the website. This is a single page that acts as a secondary shop. Here users can see photos of finished cars, read a description and click the Contact for more info button. The button takes users to the website’s contact page.

Step 1: How to Edit the Tbird For Sale Page

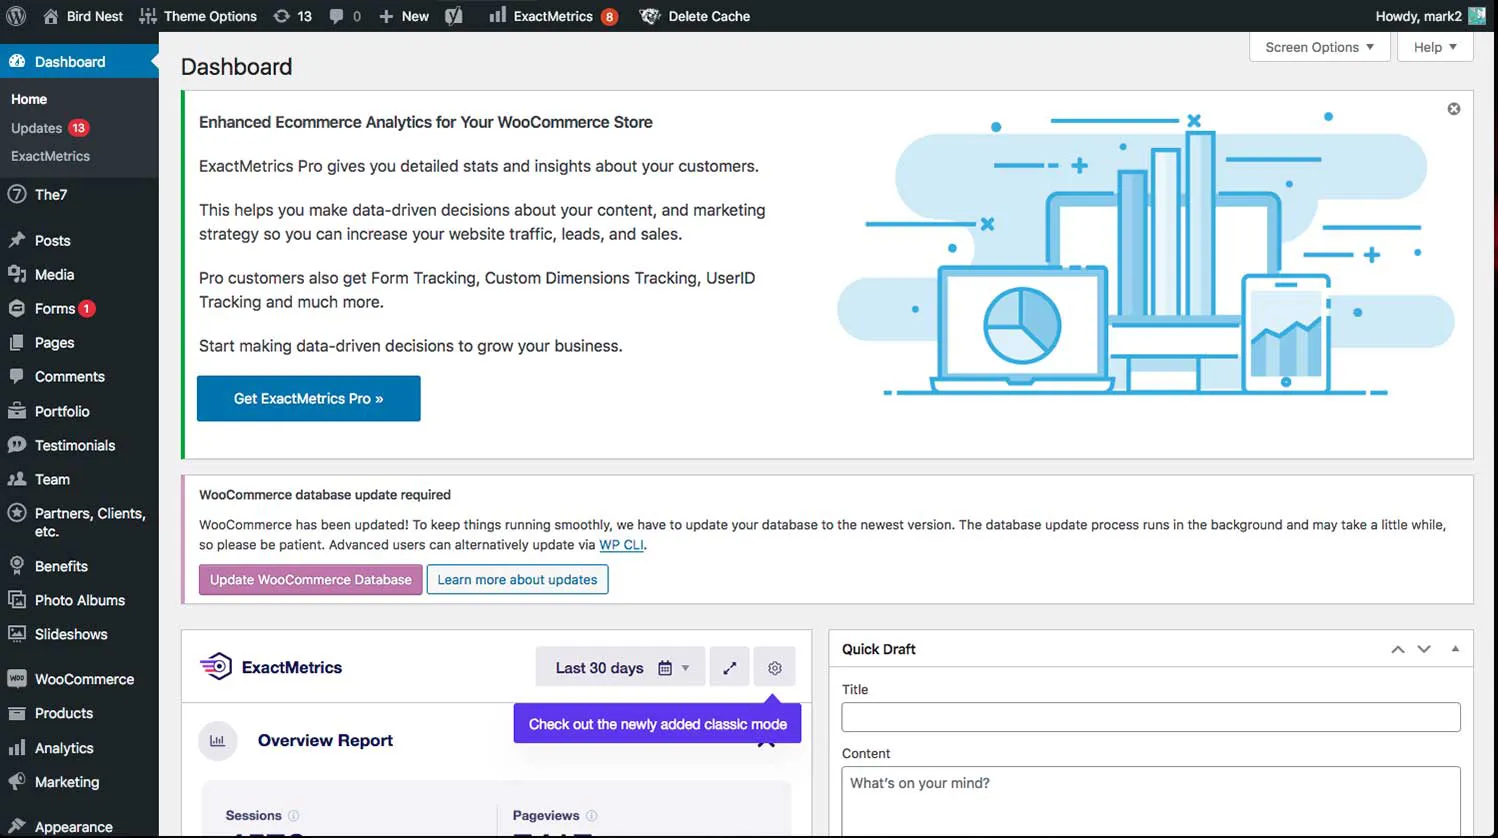
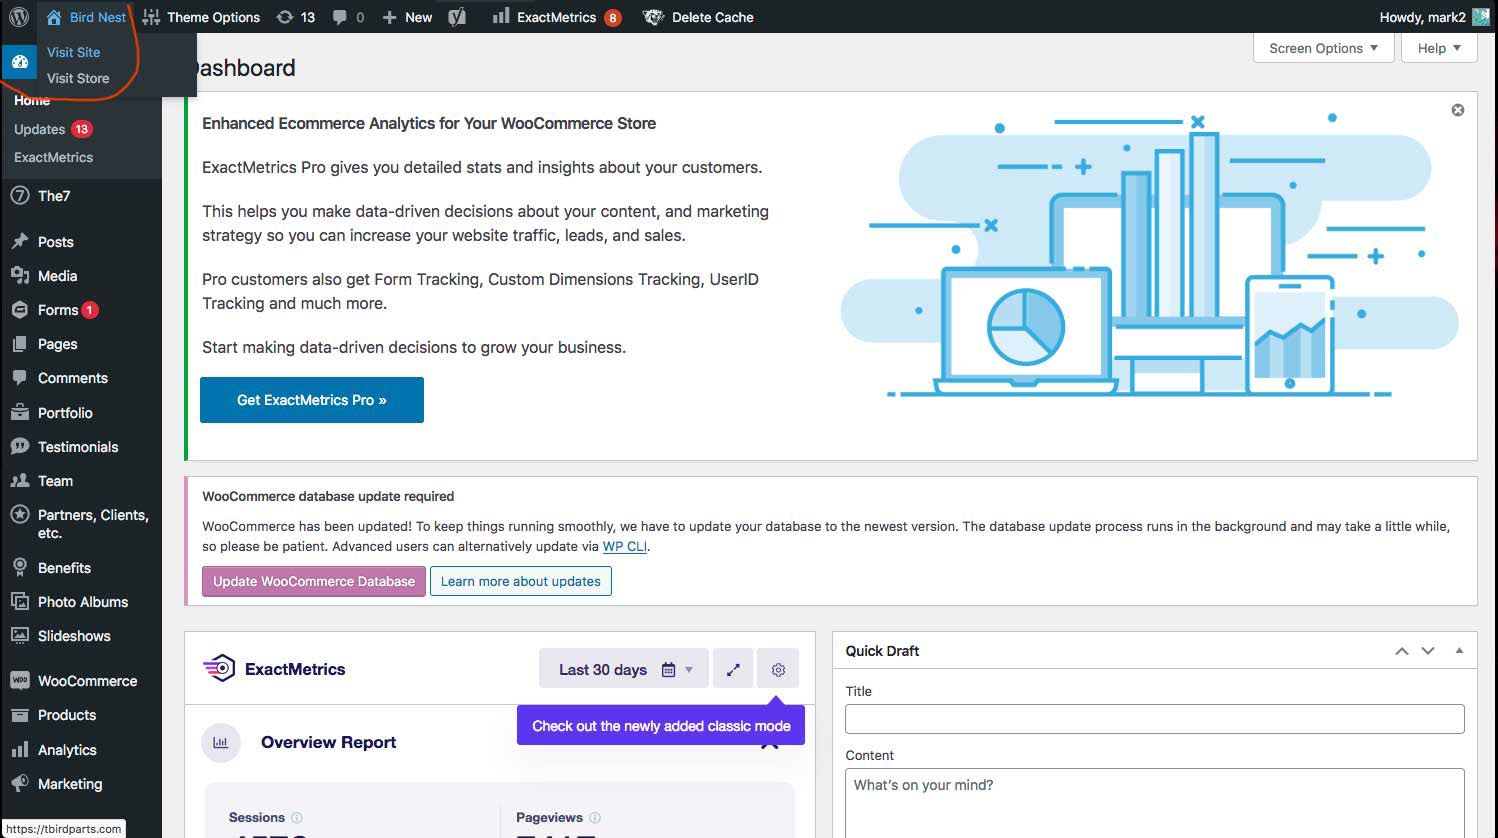
After you login to the site you will be sent to the backend dashboard. There is a navigation menu on the top of the page and on the left side. Hover your mouse over the top left corner that says Bird Nest. Click Visit Site.

Step 2: Edit Page Directly

From the Dashboard you can use the black menu on the left and navigate to the “Pages” section. Inside you will see a full list of every page on the site. But the easiest method is to go to the homepage of your site and edit the page directly.

When you land on the Tbird For Sale Page you will see a black menu across the top of the screen. This only appears for users logged into the website. Click the Edit Page Button.

Step 3: Use Visual Composer Block Editor

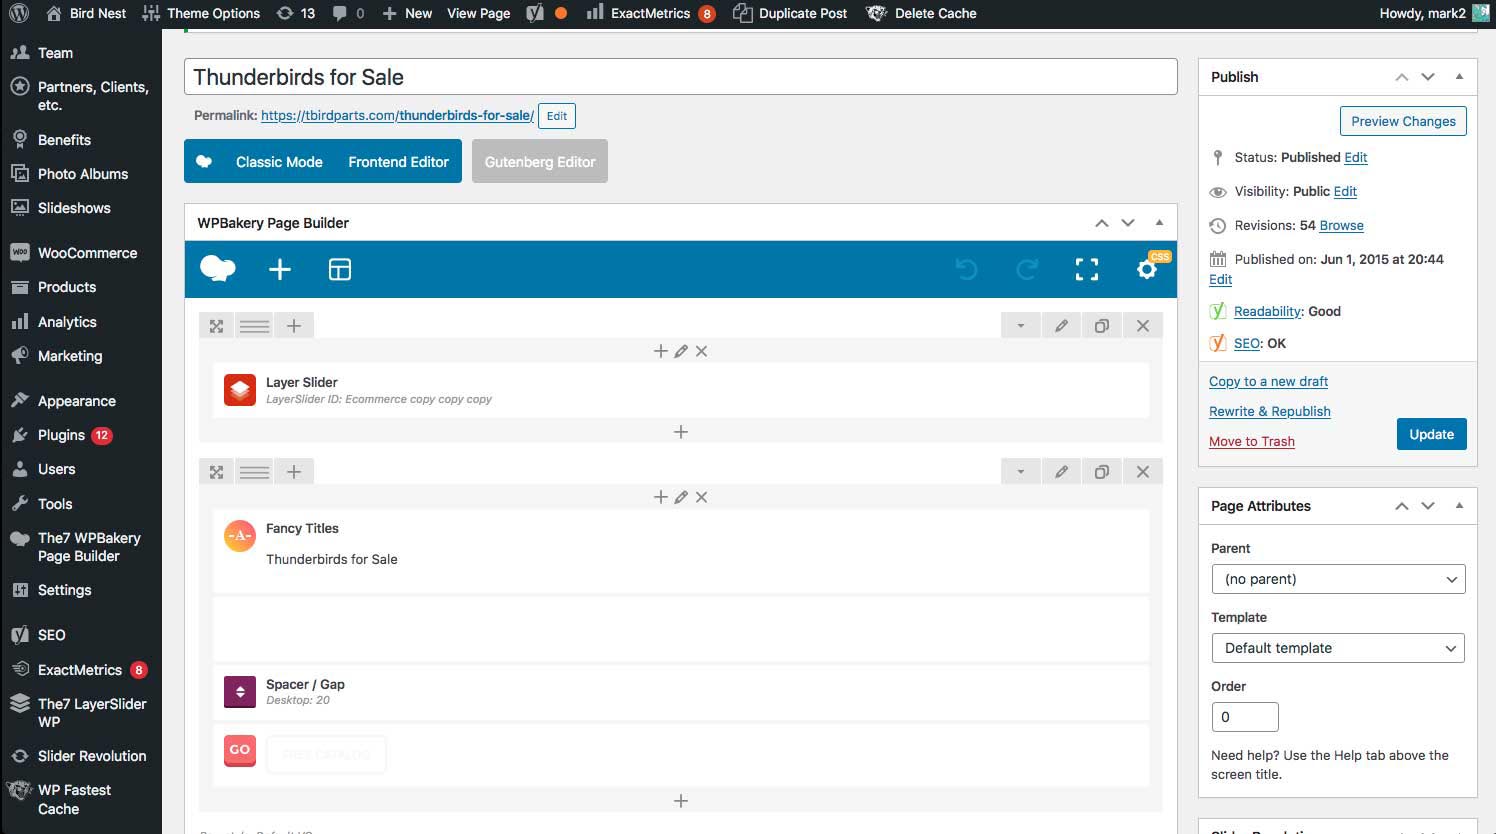
Normally the backend is a wall of code and its difficult to make edits unless you know what your looking for. The Bird Nest website uses a plugin called Visual Composer. This stylizes the code into a block editor with drag and drop features.

Step 4: Understanding the Layout

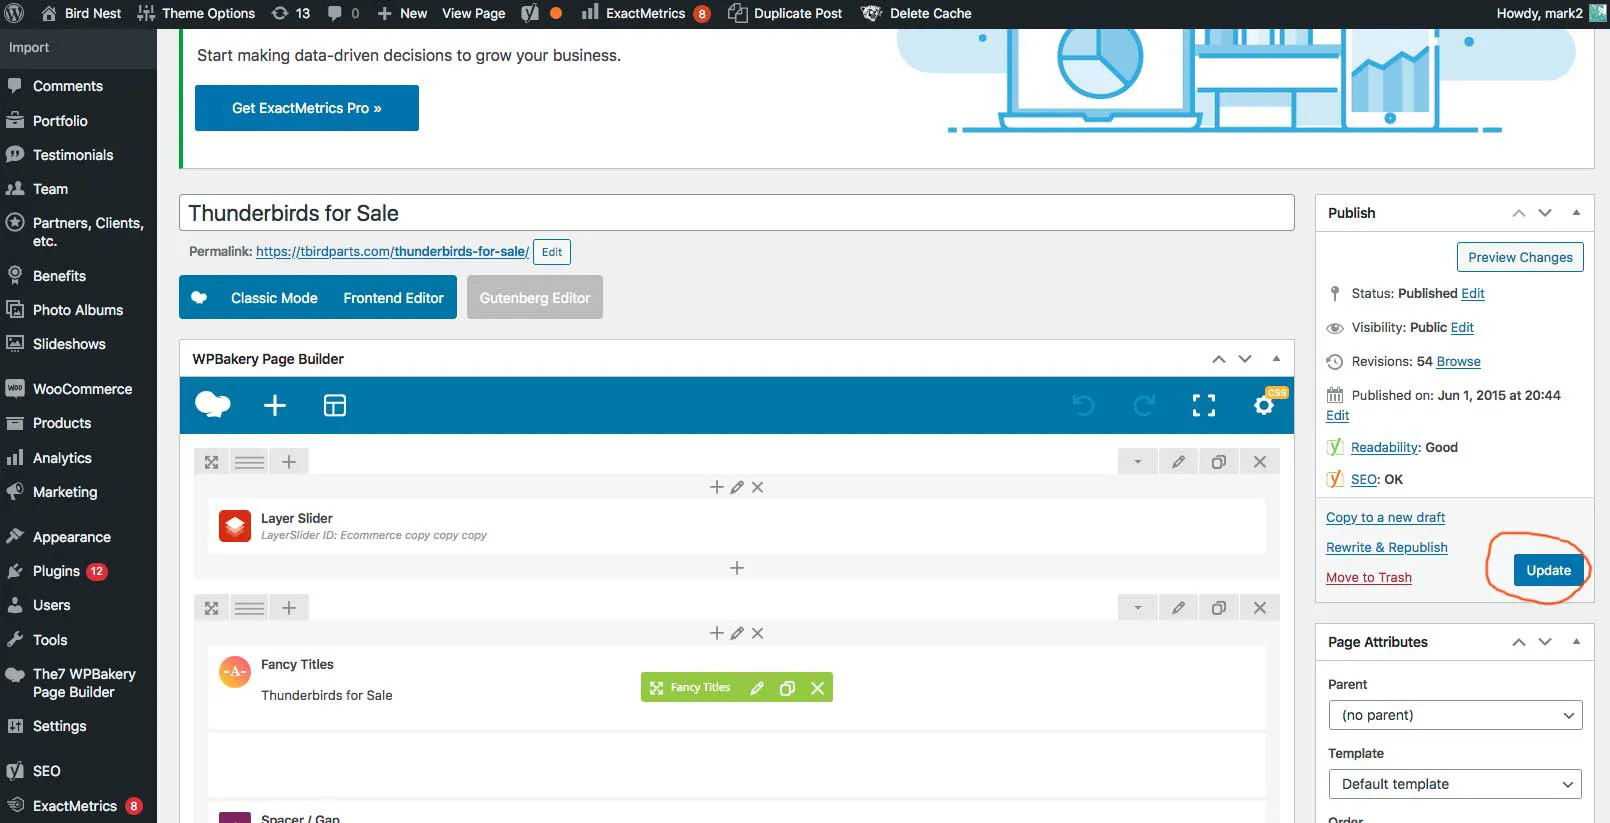
The first section titled Layer Slider is where the opening header images are. We will come back to this later because it has its own menu found else-ware on the site.

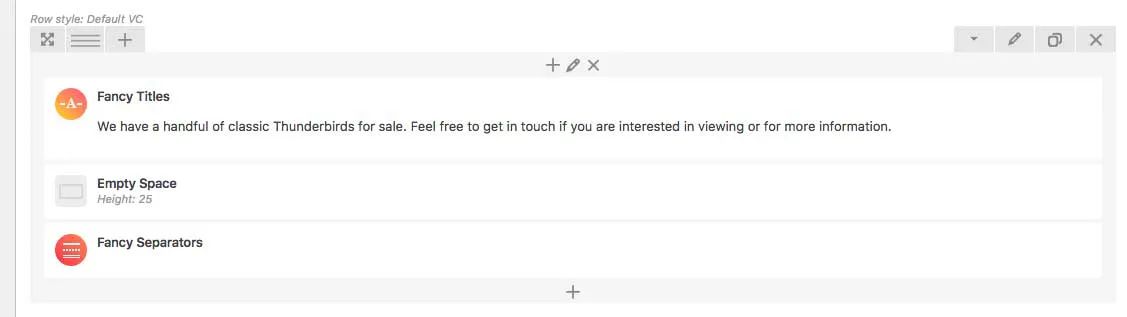
The second section has an Orange -A- Icon called Fancy Title. This is the opening caption to the page. Currently all Fancy Titles have h2 tags enabled. Those are required for SEO. (Search Engine Optimization)

Step 4.5: Mobile Intro Section

Below this section you will see another that looks very similar. Its not an exact copy. This section is designed for mobile devices. Sometimes having a slider on a page looks funny on a mobile display. To get around this a new section is created with larger text designed specifically for tablets and phones. The section uses a single image instead of a transitional slider. This improves loading times of the page.

Step 5: Updating Title

Hover your mouse over the Fancy Title element and you will see a green pop-up with a pencil icon. Click it.
This is where you can edit the title and price of the product. Once you enter in a new description click the Blue Save Changes button.

Step 6: Update The Page

In Step 5 you updated an element within Visual Composer. To make sure your progress is saved you will also need to update the page. Updating a page should be a frequent action. Its very common to accidentally close a browser tab or loose internet.

To update scroll to the top of the page and click the Blue Update button on the right side of the page.

Step 7: Change Product Description

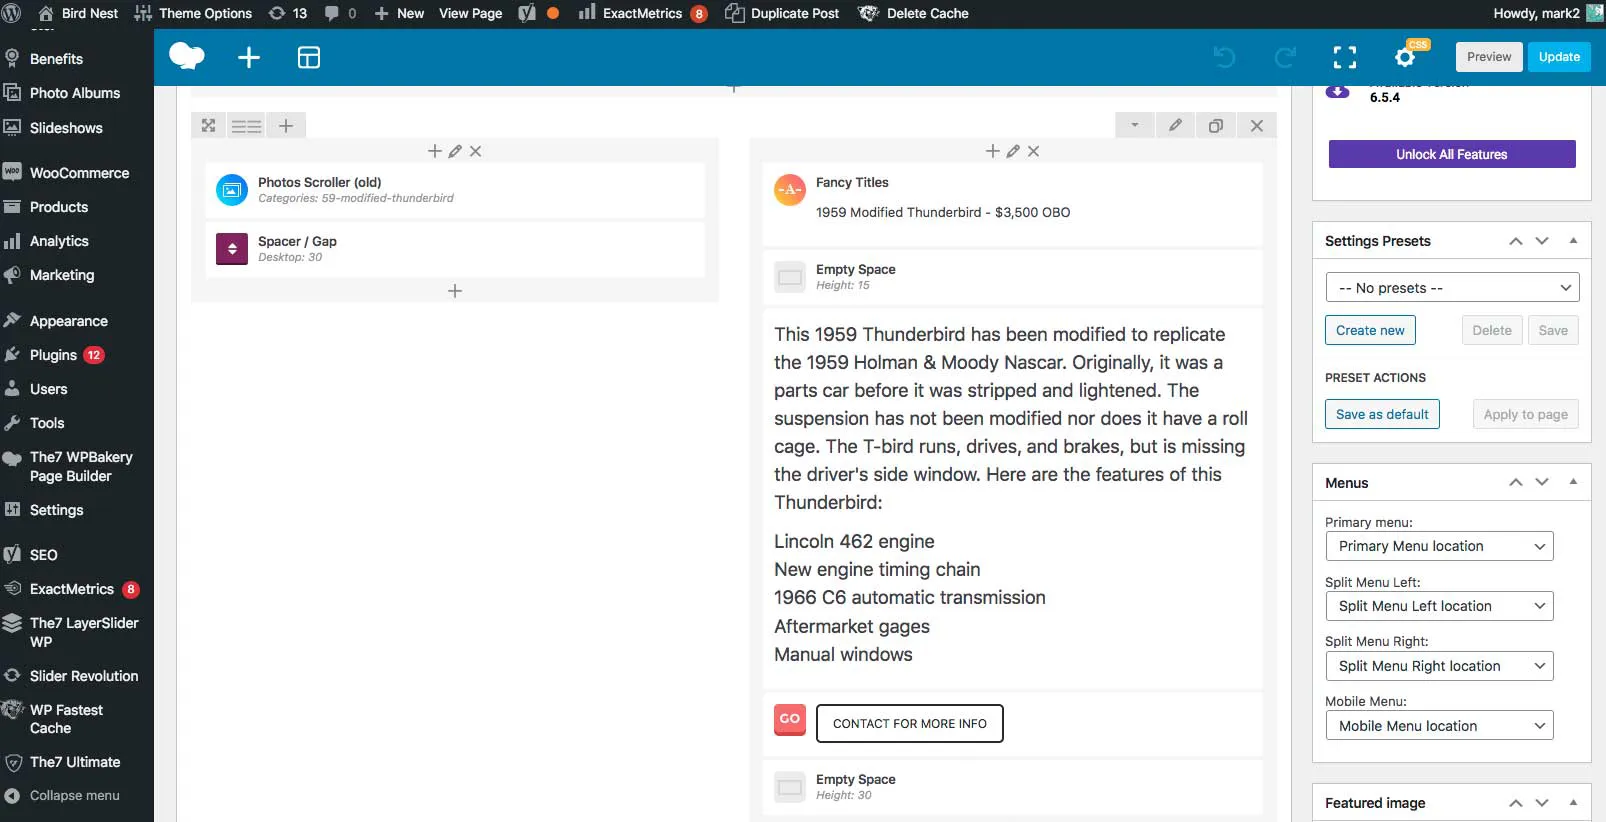
Hover over the text like you did in Step 5. Click the green pencil icon and this will open the text editor. Here you can type out a new product description. Click Save Changes.

Then scroll up to the top of the page and click the blue Update page button once again.

Step 8: Update Pictures

This step is very different from the rest. Hover your mouse over the Blue icon to the left that says Photos Scroller (old) Click the edit icon. Once inside you will see a window full of different categories.

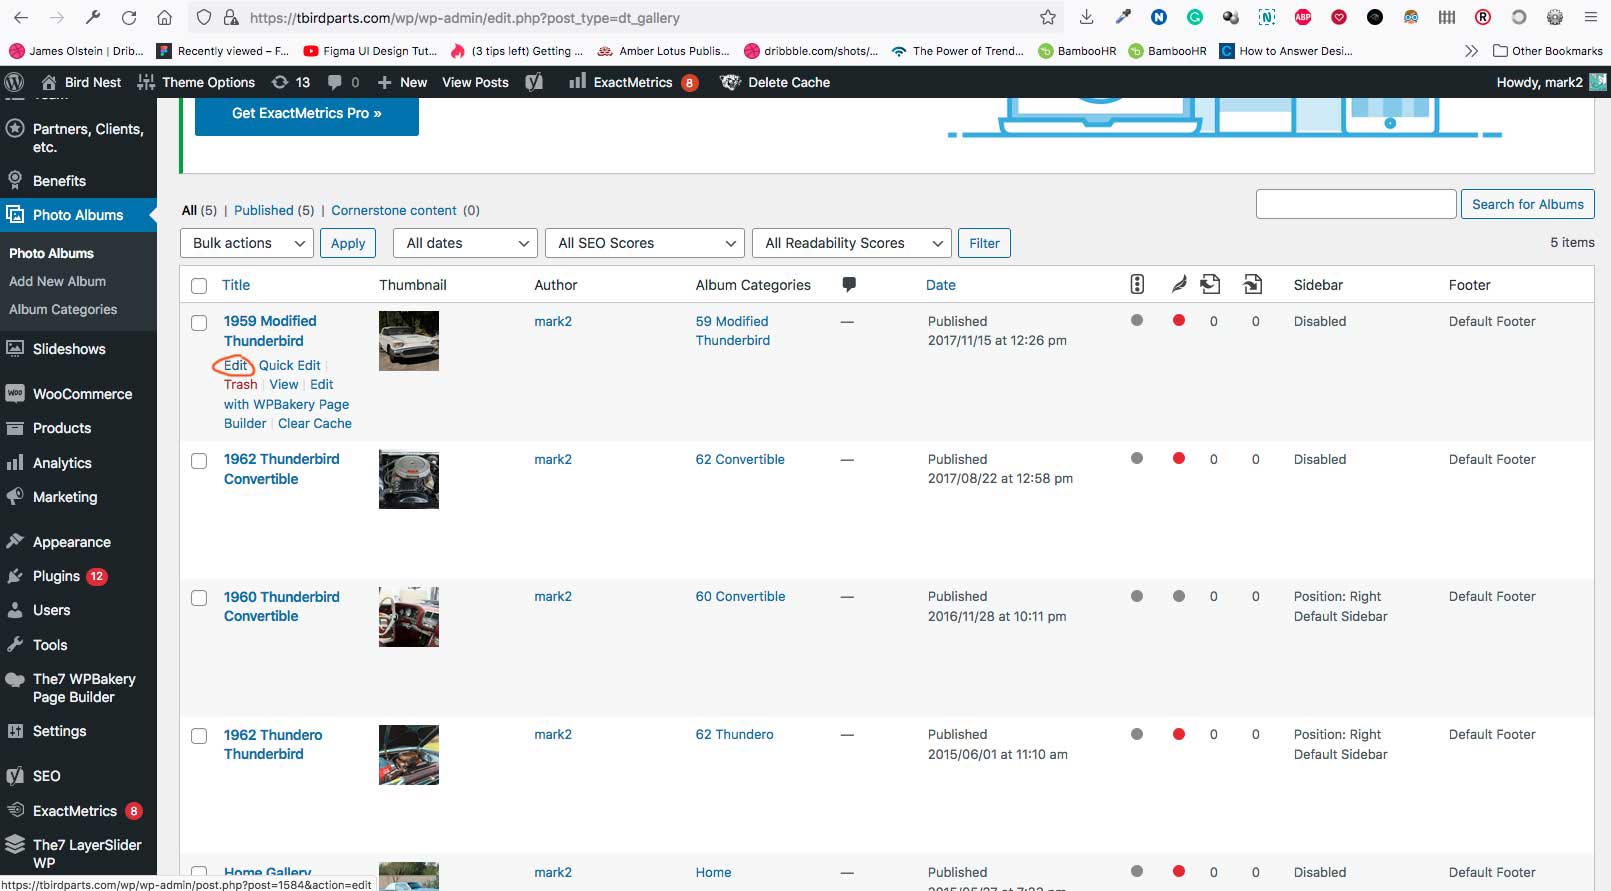
In order to update the photos you will need to edit the category directly. Click the Photo Album button on the left menu. Once inside you will see a list of all the different car albums. The first one is used on the Tbirds For Sale Page. Hover over the Title and click the “Edit” button.

When the page opens you can adjust the title. This is the large text on top of the page that currently says “1959 Modified Thunderbird.”
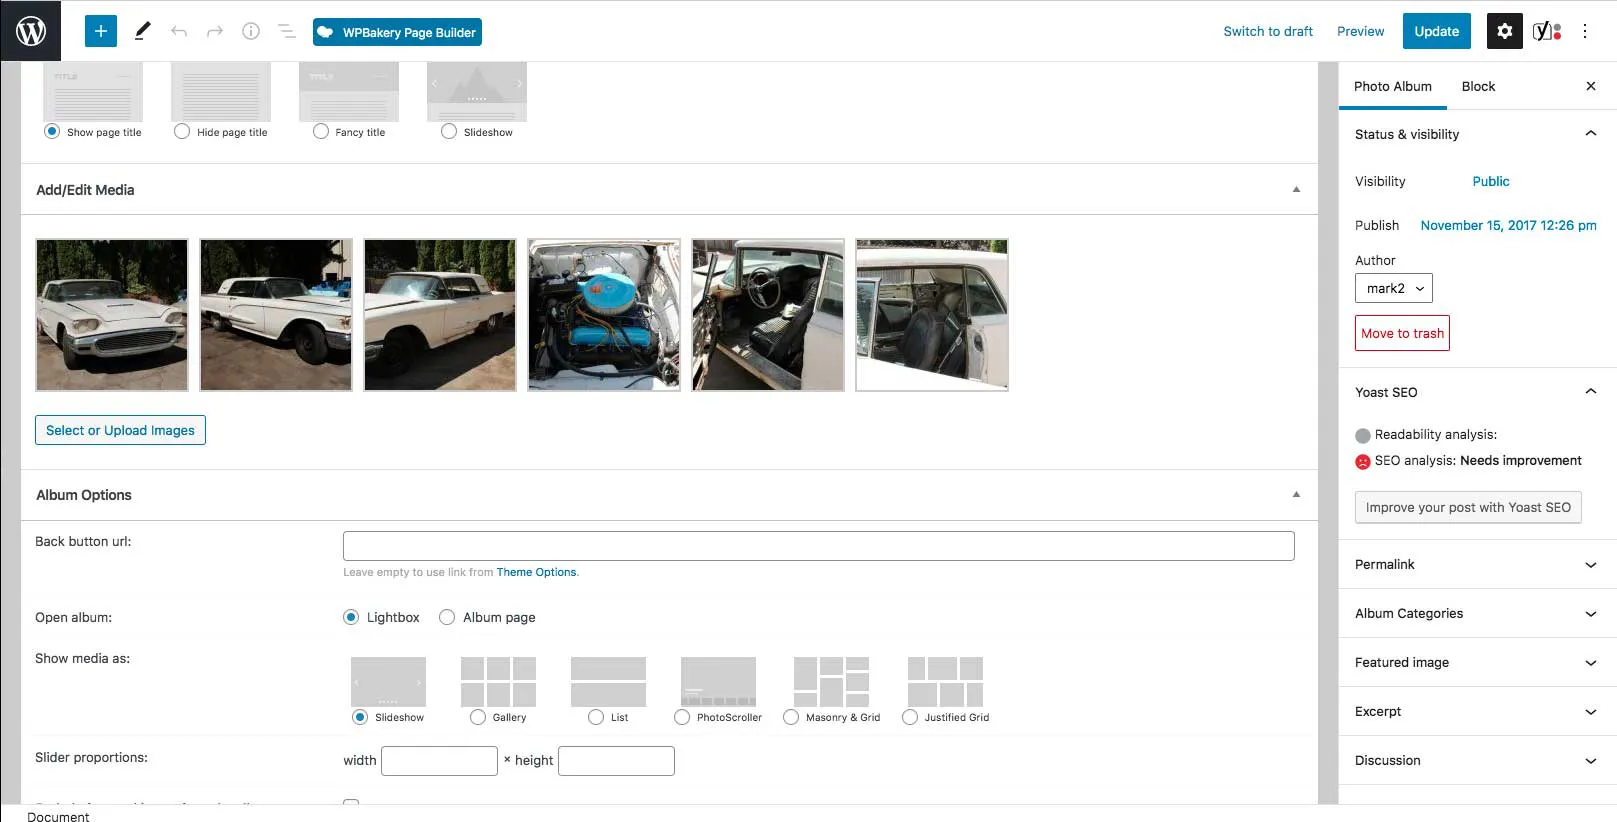
Now scroll down to the bottom of the page where you see a bunch of thumbnail car images. Click the “Select or Upload Images” button below.

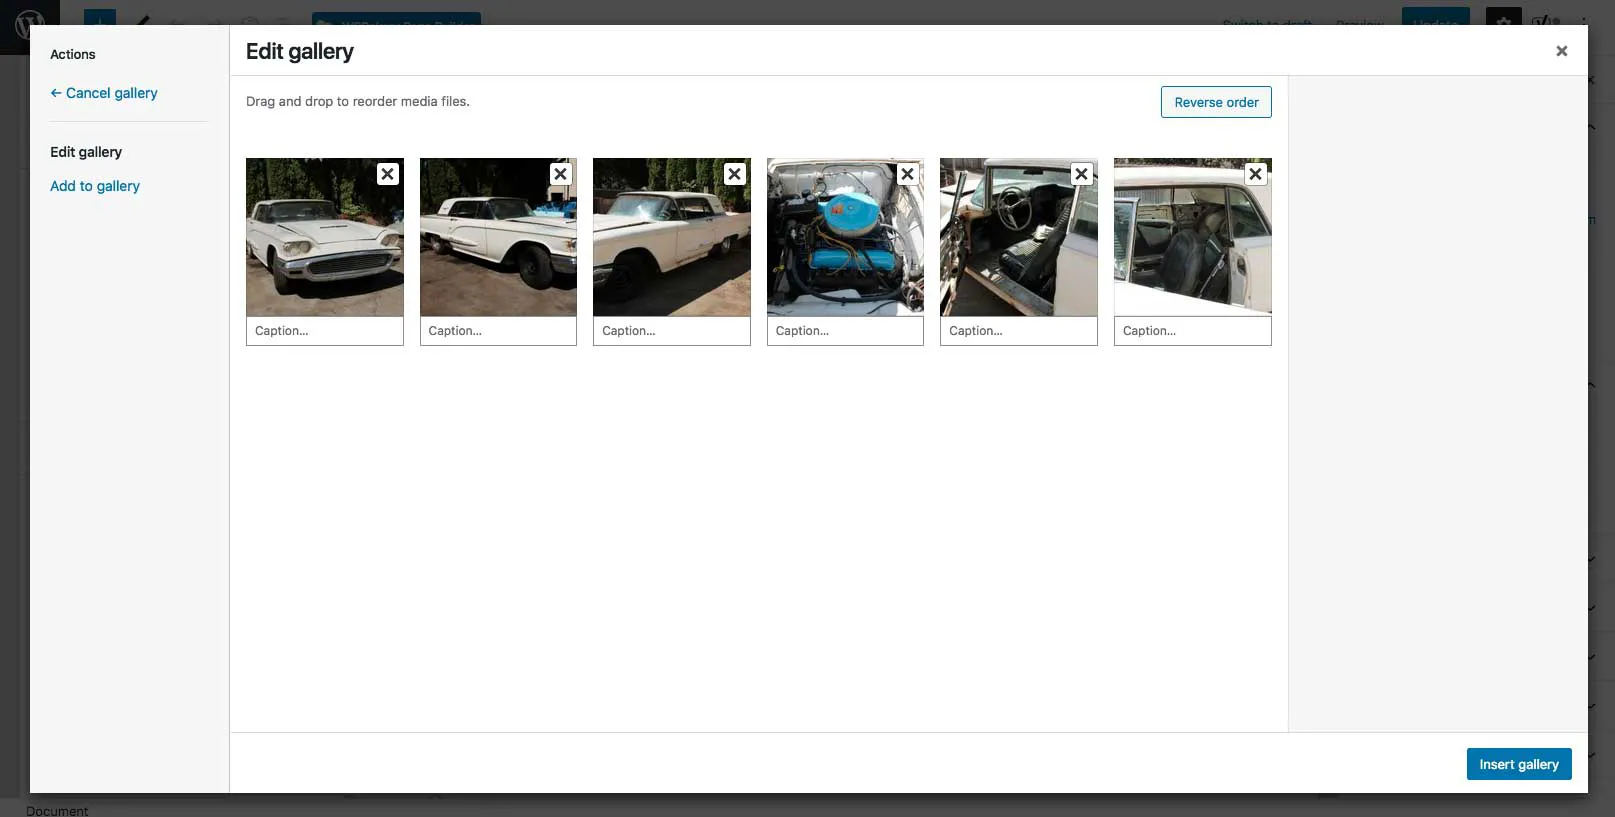
In this window you can deleate the current selection of cars and drag and drop new images. You can also change the order of the images by moving them around. Once finished click the blue “Insert Gallery” button in the bottom right corner.

Now go to the top of the page and click the Blue Update button on the top right corner. Once finished the images will be updated to that specific gallery catagory on the Tbirds For Sale Page.

Step 9: Create New Image Category

If you want to keep the existing image gallery you can create a new one. At the top of the Photo Albums page there is a button called “Add New Album.” Once you create it give the album a good name and upload your pictures just like in Step 8.

Be sure to go though the new page and make sure all the other settings match the settings in other Photo Albums. Once finished click the Blue Update button above and the page will be live.

Step 10: Change Section Color

When your looking at the Tbirds For Sale page you will notice that the car sections change background colors. It goes from White to Blue and back to White. This style choice is easy on the eyes and helps the reader view the different sections.

If the color needs to be updated you need to click the pencil icon on the row.

Now click the Background Tab on the top and this is where you will find the lite blue color. If you get into colors be sure to stick with something that already matches the website otherwise it can get weird.

*For alternating page section background colors its common to use something very lite. Such as blue or gray.

Related Posts

Related Posts

Hotjar

Hotjar

Hotjar

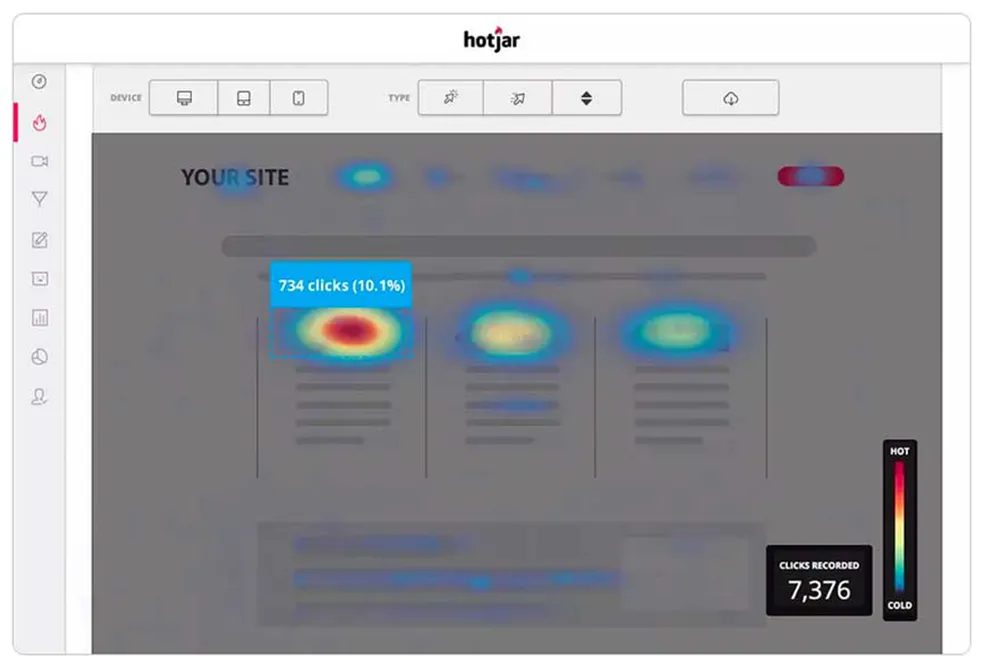
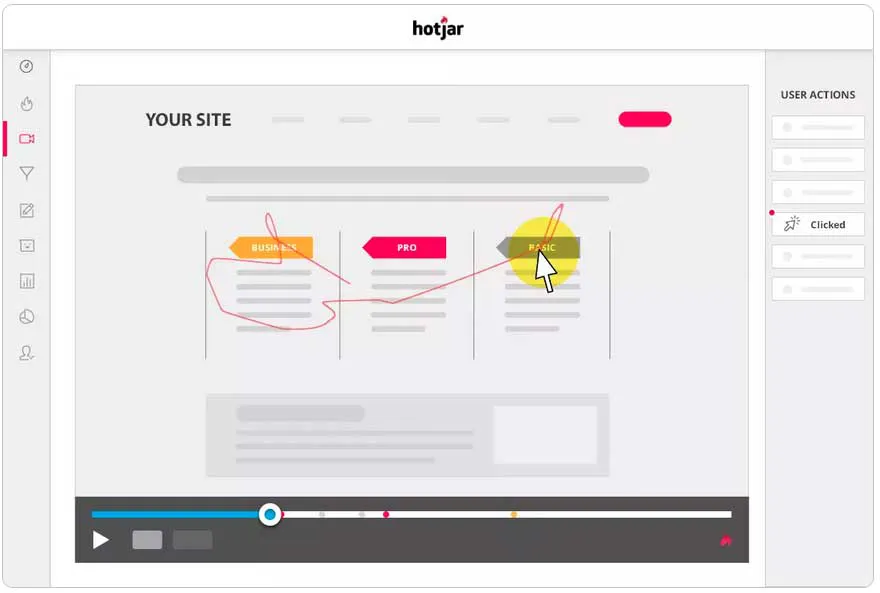
Hotjar is a free script tool embedded into the header of a website. The tool has its own login and interfaces at hotjar.com The program uses heat maps to show where users are clicking on both desktop and mobile. It also captures video and records how users interact with the site. This data can be shared with other team members within Hotjar.

To get around this I right-click with my mouse and take a screenshot. (Firefox browser) I am able to capture the full heatmap and save it locally. Videos are different there is a setting where you can allow anyone with the link to view.

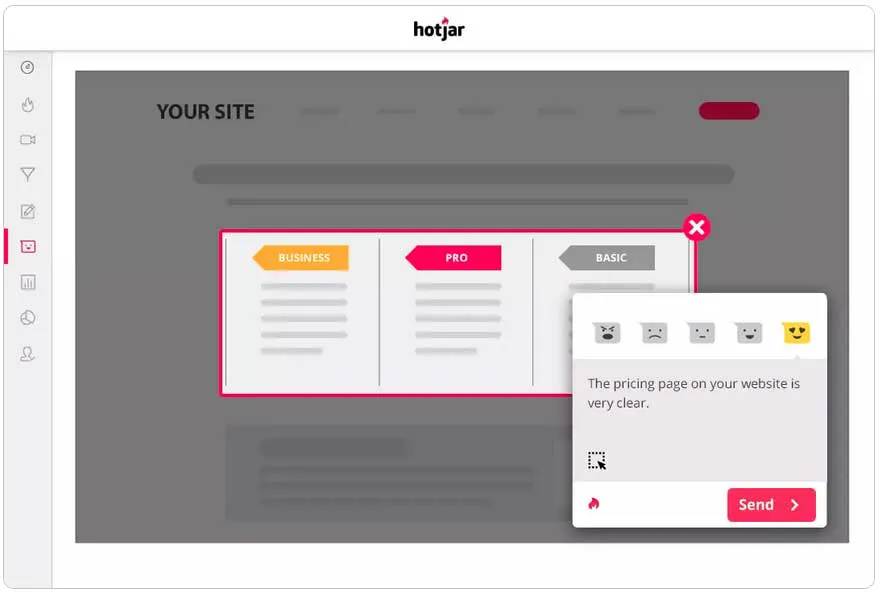
Another feature the program allows is the ability to create surveys. These are pull-out tabs or full-page popups that interact with the user. Any question can be asked. The default questions relate to user experience.

Related Posts

Related Posts

Gmail Signature w/ Logos

Gmail Signature w/ Logos

Gmail Signature w/ Logos

Create Gmail Signature

This video is a step by step tutorial on how to create a signature in Gmail with Social Media Icons and your company logo that link to your sites, professional looking and easy. This video is an example that used Facebook, Google Plus and Twitter icons.

Related Posts

Related Posts